Showing posts with label Crafts. Show all posts

Blasted Birds

I liked my little craft stall. It was nicely laid out, easy to assemble and it had a few different levels to display everything at it's best. I was happy with it, it needed nothing more.

A shame then really that I made things that need to hang up. Therein lies the problem, things that are made to hang look their best when hanging oddly enough.

I needed a stand of some description.

Or three in an ideal world.

Well in truth, in this ideal world I speak of, I would really need a bigger table to accommodate the three new stands without me having to faff around with the rest of the display.

I don't ask for much in life really!

The obvious place to look seemed to be my usual haunts, the charity shops, but I came up empty handed, new shops turned up even less options.

I needed something big up top but with a small heavy base to prevent it toppling, but the only things I could find seemed to be the opposite with some spindly little effort up top and a base the size of a hub cap.

With no other option I was forced to make my own. You may remember I've mentioned in the past that wire just isn't my things, but this is what I came up with.


I had some 1mm galvanised steel at home which would easily have supported it's own weight (the taller of the two stands is a little over 2 feet tall) but wouldn't have managed with the birds and charms in place. A trip to the garden centre turned up 3mm and 5mm wire.

If you're ever thinking of making something like this for yourself, I beg you, I implore you, go for the 3mm. I used the 5mm. My hands have yet to forgive me. I have nine extremely fine little cuts on my hands and another six on my left wrist, I didn't find most of them until I was washing a few dishes later and they hurt like you wouldn't believe!!!

On another note when I made the first stand, I cut the wire to the right length, held them all together and bent the bottom ends out to create a little base for the weight in the jar at the bottom to hold onto, I then wrapped the six lengths of heavy wire with the 1mm I already had. Don't do this, leave 'em straight, leave 'em straight, leave 'em straight until you've finished wrapping them because that tiny little base at the bottom turns into the spinning wheel of angry death while you're wrapping it, hence the six cuts on my wrist.

I live and learn:)

Remember me

It feels like it's been so long since I've written anything, but it's really only been a few days. I've no real concept of time passing at the minute to be honest, any routine we had is long gone what the school holidays and what have you.

I have no more news about my dad at the minute. We're still waiting for his assessment appointment, which should have been today but wasn't so it may now be next Tuesday. He needs to have the assessment before the operation and although he seems to be fine his doctor is concerned at the length of time he's having to wait because he's still losing quite a bit of blood.

We've been very patient so far but unfortunately it seems that rather than patients being seen in order of most urgent, it seems to be more a case of who pisses off the hospital staff the most and causes them the most headaches, so we'll try that for a bit and see how it goes.

I've been keeping myself pretty busy as usual between mucking about with Chloe and work, I've had a few commissions in the past week or so, though I'm fairly up to date in that I'm down to one remaining current commission and I've just taken a new one as well, so that will keep me occupied for a while.

My lovely husband who claims that he is not influenced by anything he watches on tv, saw a report on said goggle box yesterday stating the incredibly concerning fact that 1 in 10 children don't know that a conker comes from a horse-chestnut tree. When I was a kid conkers came from conker trees and were promptly hung on the end of the sturdiest shoe lace to be found in the house, usually from one of dad's work boots and I turned out all right.

For the record our primary school was also surrounded by "helicopter trees" and were referred to as such by the pupils and the teachers!

Anyway, long story short is that I now have a bowl full of conkers in the kitchen, kindly brought home by the husband for no reason whatsoever!


This is what I'm currently working on. It's a bag and fascinator (my first eep) for a gala at the end of the month. I'm glad that it's being delivered in person, because it's an absolute mare to photograph. It's actually a blueish green and what looks like handfuls of dust in the photo are actually tiny silver sequins, the quilting is silver embroidery thread too. It isn't finished yet, well I suppose it is in the sense that it functions as a bag but I'm still waiting for peacock feathers to arrive. I'll hopefully have this one complete and delivered by the weekend.


I'll be making a start on the new commission for a wall plaque this evening and I'm looking forward to that.

I also have a sale on my Folksy shop at the minute from page five onwards. A lot of things are up to half price as I desperately need to make some room in the stock room (read two stock boxes which fell in love, mated and spawned half a dozen ickle stock boxes which are fast growing into half a dozen strapping lads and I don't really have a room specially for them).

Of course the husband occasionally complains about the amount of space I take up around the house, at which point I offer that we do in fact have a spare room which I could move everything into (you remember the man room right?) and he shuts up.

So that's basically what I've been up to or at least plan on being up to over the next few days. That and making sure I have everything ready for Chloe's return to school next week. I can't believe the Summer holidays are gone already, I feel a bit like Rabbit in Winnie the Pooh when he lost all the calender pages!

Rainy Days

Rain we can deal with. Rain isn't a problem. Rain and you'll usually find us still playing outside in our wellies or making a complete mess of the poor husband's lawn by making mud with our bare feet.

However, rain which comes at us sideways is a different matter altogether. Not even Chloe will brave rain in a storm for the sake of a muddy puddle.

Still at least a morning stuck indoors ended with a few things to brighten up her room until Summer when she'll spend a few days with my mum while we repaint and carpet the room for her.

Bunting by mum....


And a kite by Chloe .....


At least the sun has come out since, we might even have to resort to buckets of water to get those muddy puddles on the go again:)

As Promised

Here is the latest batch of feltie goodness for Chloe's upcoming birthday.


I'm particularly chuffed with the apple and the banana, if only because the banana peel is completely separate so the 'fruit' is just tucked neatly inside:)


The bacon isn't quite finished yet (for those of you with a keen eye). The front still needs to be stitched to the back, but you at least get the idea.


But please, please, please don't ask me what those little swiss roll looking things are because I haven't the faintest. I had a few strips of different coloured felt, it was late, this is the best I could come up with. I like to think of them as little sandwiches a la Fanny Craddick, but they'll end up being whatever Chloe imagines them to be.


I've had to pack away all the felt food for today, though I'll hopefully get the orange and pear I have sitting here stuffed and finished off this evening. I'm in the middle of trying to cobble together a half term holidays box for Chloe.

I had a big gift box handy from Christmas and so far I've added in a couple of new (to her) books, a couple of colouring books, some new cookie cutters (picked up in the charity shop), finger paints and bingo markers and a zip lock bag filled with scraps of felt, craft paper, feathers, sequins and who knows what else for gluing and sticking.
And I'm making a little purse kit made from craft foam, a button, a plastic needle and some pink cord. I'll basically be a little three fold purse with a button closure and will be sewn together using the pink cord, with more of the cord for a strap. I'm marking it out and will pre-punch all the 'sewing' holes for her to pass the threaded needle through rather than having to force it through the fabric.

So what do you think, do I have enough to occupy an admittedly easily bored child for a week? I'm not quite sure yet, I may have to plunder around the house for more Fun Things To Do This Week:)

Labra Kadabra - The World Famous Magician

Earlier this week the very lovely Hotdog and Me posted a thread on Folksy. Simple enough, she would send a sock dog kit to the first ten people to comment on the thread and all of our crazy makings would be listed in the Crafteroo Shop on Folksy in support of Children in Need. She sent out 12!

Anyway, I was all over it like flies on ... ahem!

I had a couple of ideas floating around my head and decided that I'd make my mind up when the kit arrived.

The very next day, my postie knocked the door and there was my parcel....

Yes, I know the drill. Receive a parcel, take a photo, post the photo.

Impatience thy name is Leanne.

After a couple of days of fitting in little bits of stitching here and there during sickipoo nap times, Labra Kadabra is finally finished.


I should probably mention that he's a world famous magician because he isn't very good at magic.

Check out that poor bunny!


He was listed in the Crafteroo Shop on Folksy a short time ago, but you can't have him.

He's sold already and will be heading off to his new home first thing tomorrow.

However remember now, 12 kits were sent out and Labra is only the warped result of one of the kits, so keep an eye out in the shop. They'll be popping up quite regularly, although if Labra was anything to go by, you'll need to be quick. Really, really quick.

Clarification

Alright, here's the thing. Yesterday I posted that I have already completed, wrapped and labelled all of my Christmas presents for people outside the house.

I may have given the impression that I've been toiling away and now have a huge box filled with dozens of beautifully handmade gifts and I'm thinking now that I should have elaborated on that a little more.

Last year, as much as I said at the time that I was cutting back and having some common sense by the time the New Year rolled around the total amount of presents I had made, bought and gifted ended up being as much as any other year. And if you had visited my home after Christmas you would have been forgiven for confusing my kitchen with the stock room at Marks and Spencer. There were at least ten tins of biscuits and likely more than that but I've blocked them from memory, countless boxes of sweets and chocolates were stashed everywhere. We tried giving the stuff away but everyone else seemed to be in the same boat. It was completely ridiculous and we were still trying to get through the stuff at Easter, in fact there's still a tub of Marksies mint collection chocolates in there that will need to be thrown out.

I swore to myself after last year that this Christmas we would be much more sensible. I told everyone that I would rather they hung on to their money rather than buying sweets and biscuits to give to us and I've reminded the of that since then. It sounds harsh but something along the lines of "don't buy for me because I'm not buying for you", it really does seem to be the only way to get the message across. Plus money's just going to be a lot tighter for everyone this year and I'd hate the thought of someone feeling obliged to buy me present.

So at this particular moment in time I have my whittled down list. So far I have prepared gifts for my mum which are a bag which I showed you the pattern for earlier in the year (although it wound up being teal and I changed the cable design for something more traditional (read more repetitive and quicker to knit) with two short handles instead of the long strap) and another shopping bag (one of the old fashioned mesh market bags with the round plastic handles).

I've made another beanie hat for my brother. He loves the look of knit hats but likes it when I make them for him because I line the hat with t-shirt cotton so its soft against his wee head and I've also made him a phone cosy for his blackberry (its only new so there's no chance of him upgrading as xmas). My dad is getting a phone cosy in his football team's colours (Man City) and a waterproof drawstring bag to go inside his backpack when he's on the motorbike to keep all his bits and pieces dry.

Beyond that I've made simple messenger bags for two aunts, Ann and Eleanor, who have been very good to me and my mum over the years (she wouldn't have been able to go back to work and probably would have lost our home when my dad left had it not been for them) and lastly I've knitted a gorgeous poncho for Ann's youngest daughter (my cousin and Chloe's best friend). She has beautiful red hair and it can be difficult to find clothes for girls that don't have pink in them somewhere so I've went with a nice safe cream with a green flower corsage pinned to the front. I also made her two hair bobbles and a fabric covered hair band from a tutorial I saw on Craft magazine a while back for the same pink reasons.

And that's really about it for dedicated presents. It isn't much really when you think about it and they're all quite simple and quick to make but they are made with love and made specifically for the person they'll be given to.

So that's it really, four bags each taking no more than two hours each, well five if you count the drawstring one, but that took all of half an hour, a couple of phone cosies which took about an hour all in, ok the poncho took a few hours but the hair accessories were whipped up in a few minutes and a hat which took no time.

I've finished the macrame scarf now for Eleanor, one colour in bright red and I made a second one for the shop and I've started a bracelet (which I'll make a few of) and I'll use the beads I received in a destash swap just placing them along the core strands and using the working strands to secure them.

I have to say though, when I look back over the things I've made and realised that it's taken, what, maybe 15 hours all in, 20 if you count the time thinking about what to make for each person I'm kind of disappointed in myself for not managing to be more organised in previous years. There just hasn't been any good excuse for not having things done (Last year was a mad rush to get finished).

Plus it works out well for me having, ok not everything, but a good lot done. I have my public liability insurance in place now, I'm registered as a small business (you have to within three months or they'll come looking for you, kidding the people at the Inland Revenue are lovely) and I'm just about to do my first tax return and now I'm thinking that maybe I should consider doing one of the larger craft fairs at Christmas. I was thinking about looking into St George's Market which is big in the run up to Christmas. The extra money at that time of the year certainly wouldn't hurt either.

Which means of course that now I have to make stock because that dear friends is one of the many, many things that I don't have organised.

And on top of all that I'll soon be adding another string to my bow, one that I'm really looking forward to but more on that soon enough. It'll be worth the wait, don't worry.

Have I bitten off more than I can chew?

It all started after the "incident" in my dentist's office when he may or may not have caught me stuffing business cards inside the magazines in his waiting room.

Shameful I know. What kind of person would actually do that kind of thing? In a dentist's office of all places!

Well after the incident which may or may not have happened and which may or may not have involved me, the dentist said that I was free to leave a stack of business cards or leaflets in his waiting rooms (not just my little room mind you, but all of them).

Score!

Still, never one to be satisfied with what I'm offered and possibly due to the fact that I might have been hopped up on anaesthetic (which does funny things to me by the way) I heard a voice not unlike my own enquire "What about a magazine?"

"Sure" he said "as long as it doesn't look like you've got busy with the child's crayons you can leave a few copies of a magazine in the waiting rooms". And the Arts Centre, and the library and the coffee shops and tourist information shop said they would all like to have copies too.

But, and here's the snagging point, there isn't a magazine promoting Folksy. I don't have one. You don't have one. The girl down the street doesn't have one.

There isn't one.

Well, not just yet anyway.


But by hook or by crook there will be. In a couple of weeks the first edition of GO handmade will be available for download.

Can you just feel the excitement?

And it won't be just a catalogue either. It will be packed with features on crafters and makers currently being slaved over by some very wonderful and creative people on Folksy. You'll find out what they do and where they do it. What makes them tick and what inspires them. There'll be crafts for kids and tips and ideas on what to do outside this summer.

You'll just have to stay tuned to find out whether it all comes together in the end.

Can you wait?

Folksy Teams

Folksy Teams is up and running.

It a new social media network for Folksy sellers and fans of Folksy to keep in touch and stay up to date on everything that is happening in the world of Folksy.

You can also use the network to meet makers, crafters and artists if you would like to commission a piece of work. The network is relatively new, but already we have some wonderful people showing off their beautiful work.

And while I am the creator of Folksy Teams, I won't be moderating the site as such. I'll deal with the usual spammers and the like but apart from that my hope is that the members of the group will take over and make the network their own. Already there are a handful of Folksy Groups helping friends meet, share and arrange events.

So head over and take a look. You might find some like minded crafters.

Easy Craft for Kids - The Rain Stick

Rain sticks are a great, easy and cheap kid's craft project.

You'll need to gather together the following for a basic rain stick;

Cardboard tube
Scrapbook paper or wrapping paper.
Sticky tape
Scissors
a piece of cardboard
rice or dried lentils


Start by cutting two strips of cardboard and two discs of card roughly the same size as the ends of your tube. The strips need to fit inside your cardboard tube, mine are about an inch wide. Concertina the strips of cardboard.


Place one card circle over the end of the tube and tape it firmly in place.


Turn the tube over and push the two strips of card into the tube and pour in the rice or lentils (the bigger the grains the bigger the "rain")


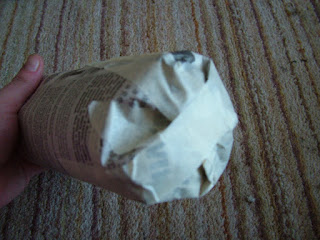
Place the other card circle over the open end and tape in place to close the tube.


Then cover the entire tube with pretty paper.


Fold the paper in over the ends and tape in place. Mine came up a little short. That's what I get for being too lazy to cut the tube down to fit the paper.


I had some craft foam stickers so I covered up the raggedy ends.


And that's you finished. Except we all know I'm all about the embellishments. While Toots busied herself covering the rain stick in balloon stickers, I made a little pompom wrist strap.

I threaded felt pompoms on to a length of embroidery thread using all six strands and then tied the two ends together.


I then threaded the ends of embroidery thread under a fold in the paper at one end of the tube and taped over it, adding a few feather to hold everything in place and covered up any little tears in the paper.


Then you're finished. And hopefully you have a happy child into the bargain.


If you want (or need, don't worry you're in understanding company) a great craft fix head over to Make and Tell Monday at The 6 o'clock Stitch.

Bitty Birdy Fridge Magnet Tutorial

I wanted to make a few things to brighten the house up for spring. We actually have some sunshine here today, although its still very cold.

I love making little fridge magnets. I started to make them when Toots was little. Letters and numbers made from felt and craft foam. The fabric and foam is a lot more tactile and gentle on her little hands than the hard plastic variety.

This is a very simple project and once you have an idea of what you would like to make you can turn out one of these magnets every few minutes.

I used:

Scrap pieces of felt from another project,
Matching thread,
Small amount of polyfill or fiber fill.
Small amount of black embroidery floss.

You also need very basic notions, just a pair of scissors and a needle.

Begin by doodling a few pictures of things you would like to make and use these as templates to cut your felt. I made the birds slightly less than 1 inch across.


The little orange pieces at the bottom of the photo are wings, beak and feet.

Next position the wings, beak and feet on the reverse of the piece of fabric to be the front of the magnet and tack in place. Then embroider some eyes. I think this one would have looked a little better if the beak was slightly lower on the face. Still I'll know for the next one...


The place the second circle of felt behind the face piece and slip stitch using small stitches around the outside edge of both circles, leaving a small gap to stuff.


Stuff the birdy using a small pinch of polyfill.


Then carry on slip stitching over the opening to completely close.

Once the birdy is closed, glue a small magnet on the back of the birdy and leave to dry. I happen to have a bag of rare earth magnets which I prefer to use. I know then that I can make a slightly heavier magnet and it will still stay on the fridge. However, don't feel like you have to run out and buy something specific. Before I started using rare earth magnets I just went to my local pound shop (dollar store) and bought a huge bag of those plastic alphabet magnets and popped the magnets out of the back of them.


And there you have it, a bitty birdy fridge magnet.


And it isn't just birds either. You could have birds, butterflies, little fluffy white lambs and Easter eggs in spring, a swathe of flowers in summertime, beautiful rust coloured leaves, with pumpkins in autumn and then snowflakes made from craft foam and painted with clear glittery nail polish along with a little santa or two and snowmen.

You'll seem so organised and together with your seasonally coordinated fridge and I won't tell anyone it only took you a matter of minutes if you don't.

If you liked this tutorial and are craving more, please head over to Make and Tell Monday at the 6 o'clock stitch.

Because she really
has it together.

Recycleable - Paper Doll House with Update

I originally posted this tutorial at the start of the year when the weather was miserable and I needed a quick fix for a bored preschooler. It seems the idea went down well and I wanted to post it again in honour of Kristen's "Best Of Theme". I have updated the tutorial at the end of the post and if you want to jump straight to the update, please feel free to do so

We were all set this morning, coats, gloves and hats on and ready to head out the door until...

Snow...and rain...and icy winds...and...no

So back inside and now I have a three year old who was desperately looking forward to a walk around the town this morning,

Because this morning we were supposed to be going to get her some new ballet pumps.

Ah well, such is life I guess. I'll measure her feet and run down tomorrow while she's with Nana, come hell or high water.

So I needed something to take her mind off the fact that she still wanted to go out regardless of the weather.

Hmm, crafts with nothing planned.

A paper doll house.

All you need to complete this very simple project are;
  • 2 pieces of stiff card (or a cardbox box will do).
  • A glue stick (or PVA or Mod Podge, whatever's within reaching distance)
  • Some sharp scissors (for you)
  • And the Ikea catalogue (or home inspiration magazines like Ideal Home).

You need to have a quick flick through the catalogue or magazines and tear out any pages with a room which pretty much covers the majority of the page (its easier to manage this with the Ikea book trust me, but then beautiful glossies don't have huge prices printed in the middle of the kitchen, so). Then with the scissors cut a very narrow slot halfway along the long side of the card and halfway through the card. Slot the two pieces together to look like this.


Then you want to give the three year old a glue stick and swan off into the kitchen to make a cup of coffee. Now you'll need a damp sponge to quickly sponge the (hopefully) still wet glue off the carpet because you weren't intelligent enough to put a mat or drop cloth down first.

Or if you're that way inclined you can sit and watch to make sure she "stays within the lines".


It's much easier if you keep the two pieces of card slotted together and then lie the whole thing flat on the floor, that way all you have to do is make sure that the magazine pages you stick to the two facing sides are both of a kitchen, or bedroom or whatever.

Like this.

Carry on around all four sides (you'll need eight magazine pages in total) and it should wind up looking something like this.


Doesn;t she looked pleased with herself. I cut two small slots near the corners at each side of the "kitchen" and strung a length of silver cord across, before hanging up a little t-shirt and trousers I cut from some old fabric. I'd picked up those tiny clothes pegs to use for hanging cards at Christmas and I've been trying to think of something else to use them for.

If you're feeling particular inspired and creative you could always colour the pieces of card yourself, then cut out individual pieces of furniture, chairs lamps that kind of thing and have fun designing your very own rooms.

I'd love to know if anyone does this their child.

For more great WFMW tips and ideas, head over to We are THAT Family
.

Update

The paper doll house went down so well in our house (it has become Toots "go to" toy) that we decided to make it more of a permanent fixture. We are still in the process of decorating her house but basically we replaced the pieces of cardboard with sheets of balsa wood. You could also use thin sheets of plywood or fibreboard (just make sure to seal all the cut edges and wear a dust mask while cutting). Best of all we're finally using up all the paint and wallpaper leftover from decorating our own home.

Oh yes, we're making her a mini version of our house, so she'll be able to play in her bedroom, in her bedroom.

I've wanted a doll's house for Toots for a long time now but just couldn't bear to part with around £100 to buy something sturdy enough to l ast, plus some of those things are a fair size and take up a lot of space while not in use. The real beauty of this house is that you can simply slide the pieces apart and slip them in under her bed.

Now THAT definitely works for me.


I'm also linking this post to the 6 o'clock stich's Make and Tell Monday carnival. You should head over there and check it out, there are some fantastic tutorials.

Freecycleables - Valentine Hearts Tutorial - WFMW


We spent today making some very simple gifts for Valentine's Day. The gift pictured above is a paper mache heart for my mum. It will be a present from Toots.

This actually turned out to be pretty quick to finish, aside from the drying time it only took around 30 minutes, which is a pity because I'd planned on keeping a slightly bored preschooler occupied with this for most of the afternoon. Ah well, c'est la vie. It just goes to show, when kids are involved, plan, plan and plan some more.

Bear in mind that it is messy so its best to throw down an old tablecloth or sheet to catch any drips.


You'll need to start off with some old newspapers, magazines, catalogues, just whatever you happen to have handy.


The newspapers I used were copies of the local paper, so about the size of an average magazine. Take two sheets of paper and roll up into a ball then cover with tape. I used decorators tape because I had quite a lot handy but any tape could be used. Repeat this process so that you have two balls.


Take one sheet of newspaper and fold in half lengthwise. Place one ball of paper close to the side of the length of paper and roll up so that you have a tube of paper with the ball close to one end.


Fold the ends of paper in and tape to the ball, cover the rounded end of the tube with tape to give it a slightly smoother appearance and make sure its well secured.


You'll end up with a basic torpedo shape like the one above.


Flatten the empty end of the tube and fold each side of the paper in towards the middle to make a point and completely cover with tape.


Make another teardrop shape the same as the first and one smaller one, beginning with half a sheet of newspaper for the ball. This should help give the right size for the small piece.


Tape all three pieces together with the smaller piece in the middle and again completely cover with tape, add some scrunched up strips of paper if you think there are any obviously "holes" in the heart shape or any sunken sections which will be difficult to fill out later.


Next comes the messy bit. You'll need to shred some newspaper and get some glue. I used 2 parts PVA and 1 part water. You can also make a very good paste using 1 part flour to 2 parts water. Start to completely cover the heart shape with strips of newspaper dipped in the paste. You'll need to build up about 4 or 5 layers.

I then added a final layer of pink tissue paper. This is necessary I just had it in the craft box and didn't realise until the last minute that I didn't have any pink paint left or even any red paint so I couldn't make pink.

You'll notice from the first photo that i changed my mind again and recovered the heart in a darker shade of pink tissue paper.

And then of course once the kids are in bed you can some fun all by yourself and go slightly nuts with the embellishments.

I have an absolute ton of buttons so I super glued a few on there, as you can see and then I cut some hearts and circles from some offcuts of craft paper I had in the box, placed them together, added yet another button and sewed them together with embroidery thread before gluing them on in the same way.

And all the craft supplies have been gathered over the years from my local £ shop (dollar store equivalent) and stockpiled.


For more great tips, crafts, recipes and loads more head on over to Rocks in my Dryer. And if you're interested I also have a great bread recipe posted today. Its also linked over at Rocks in my Dryer and I've listed some delicious additions to the main recipe.